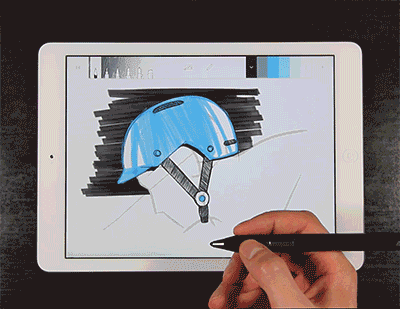
Using a Jot stylus
Using an Adonit Jot Stylus
To pair an Adonit stylus, follow the directions found in our pairing video, or follow the directions below.
Press and hold the pairing button on your stylus until the LED light begins to flash. Press and hold the tip of the stylus in the circle on the iPad screen until you receive pairing confirmation.
Stylus settings
Once you are paired, you may adjust the stylus settings inside the stylus menu. This menu can be accessed at any time by selecting the stylus icon in the top toolbar.
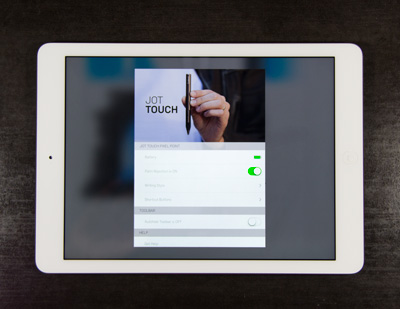
Palm rejection can be turned on or off by toggling the switch.
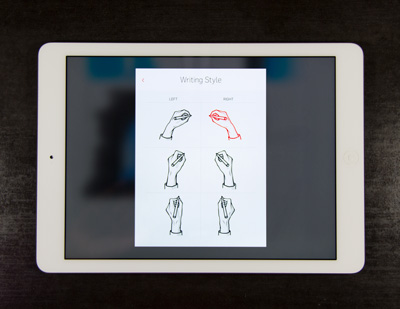
Writing angle can be selected for better precision by selecting the writing Style option in the stylus menu and then selecting the hand that most resembles the angle you hold the stylus at.
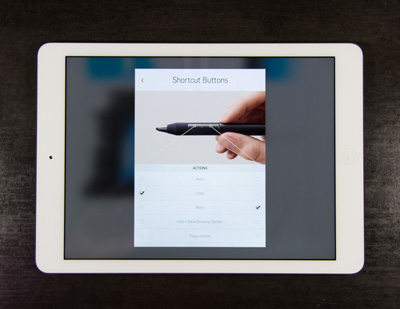
Shortcut buttons can be adjusted by selecting the “Shortcut Buttons” option in the stylus menu. Various functions are available for each button. Simply select the desired function.
The toolbar in the idea view can be adjusted to autohide by toggling the switch to on if so desired. Autohide allows you to remove the UI options from the screen to provide more surface area to construct your ideas.
Stylus benefits
Jot Touch
Pairing a Jot Touch will allow you to use palm rejection, pressure sensitivity, shortcut buttons, and a precision Pixelpoint tip.
Jot Script
Pairing a Jot Script will allow you to use palm rejection and a precision Pixelpoint tip.